Azure SSO Setup
Step 1: Create a new enterprise application
Step 2: Name and Create Application
Step 3: Choose SAML
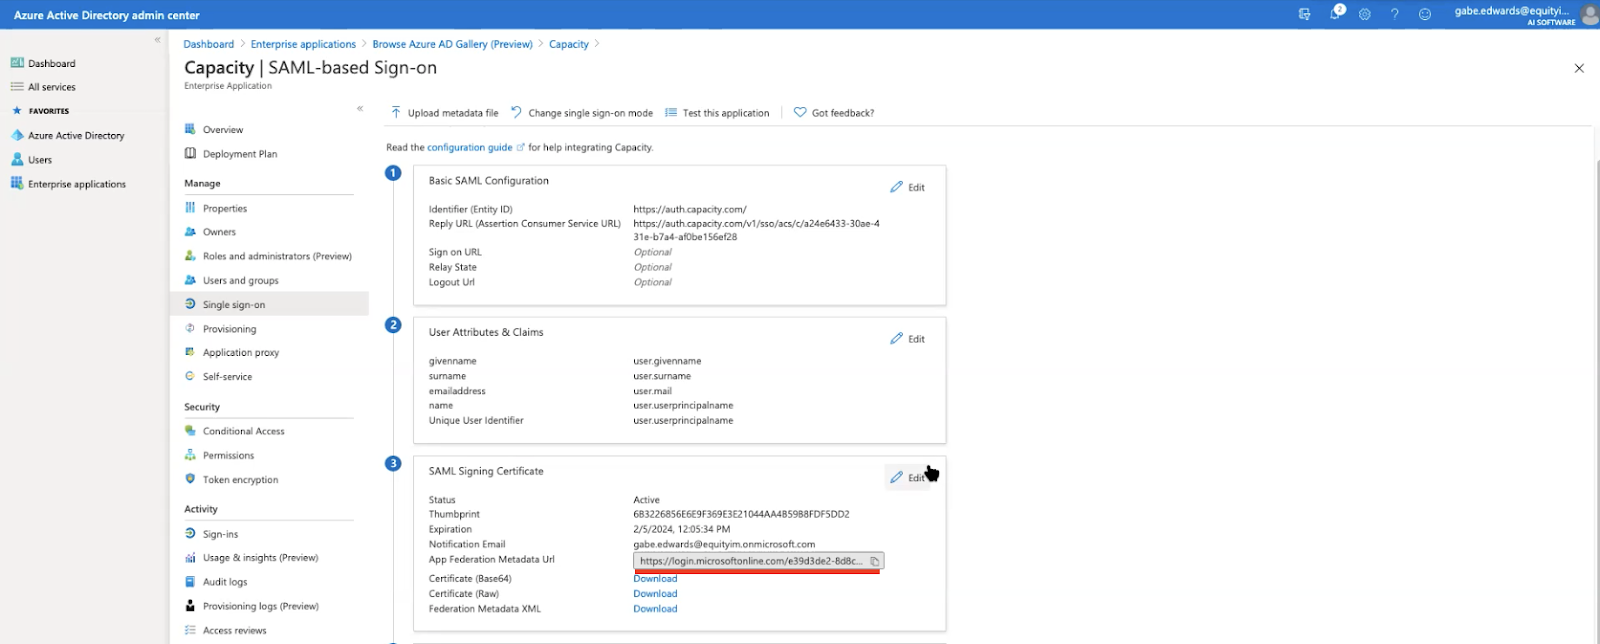
Step 4: Enter Entity ID/Reply ID
Capacity IDP: https://auth.capacity.com/
Reply URL: https://auth.capacity.com/v1/sso/saml/acs
Step 5: Update User Attributes Claims
- emailaddress
- Name: email
- Namespace: Blank
- surname
- Name: last_name
- Namespace: Blank
- givenname
- Name: first_name
- Namespace: Blank
Step 6: Add appropriate users/groups
Please complete this step prior to sending your CSM the URL.
Step 7: Provide your customer success manager with the federation Metadata URL
Troubleshooting
Error AADSTS50105 - The signed in user is not assigned to a role for the application.
In this case, the user has not been granted access to the application in Azure AD. You can refer to step 7 above, or you can use this quick start guide from Microsoft to appropriately assign users.
For more details on this error, you can refer to this Microsoft help page.