Application Development Guide
This quick 5 step guide will demonstrate how to create apps and publish them to the Capacity Console.
What is an Application?
Creating a new application in the Developer Platform is similar to creating an empty folder in your Knowledge Base. For an in depth look at the Developer Platform, take a look at our learning resource.
Step One: Create an App
How to create an app:
- Click the Developer Platform icon
 located in the left navigation bar.
 - In the upper right corner, click the + Create New App button to get started.
- Add a name for your app and click the blue Create button.

Your app is now ready to be populated with APIs.
Step Two: Add APIs to your Application
APIs (Application Programming Interfaces) appear everywhere in the programming world. APIs have pre-defined behavior and allow users to interact with 3rd party applications through inputs and outputs.
With the Capacity Developer Platform, APIs serve as the core building blocks for apps. Apps serve as containers for collections of APIs.
How to add an API to your application:
- From the App Details page, click the Add New API button.
- Provide a unique name and description for this API, then click the blue Create button.
EXAMPLE: This Exchange Rate App will have an API that retrieves exchange rates for a specific currency.

Capacity API Builder
The API Builder is divided into four sections:
- Request
- Conversation Inputs
- Response
- Conversation Outputs
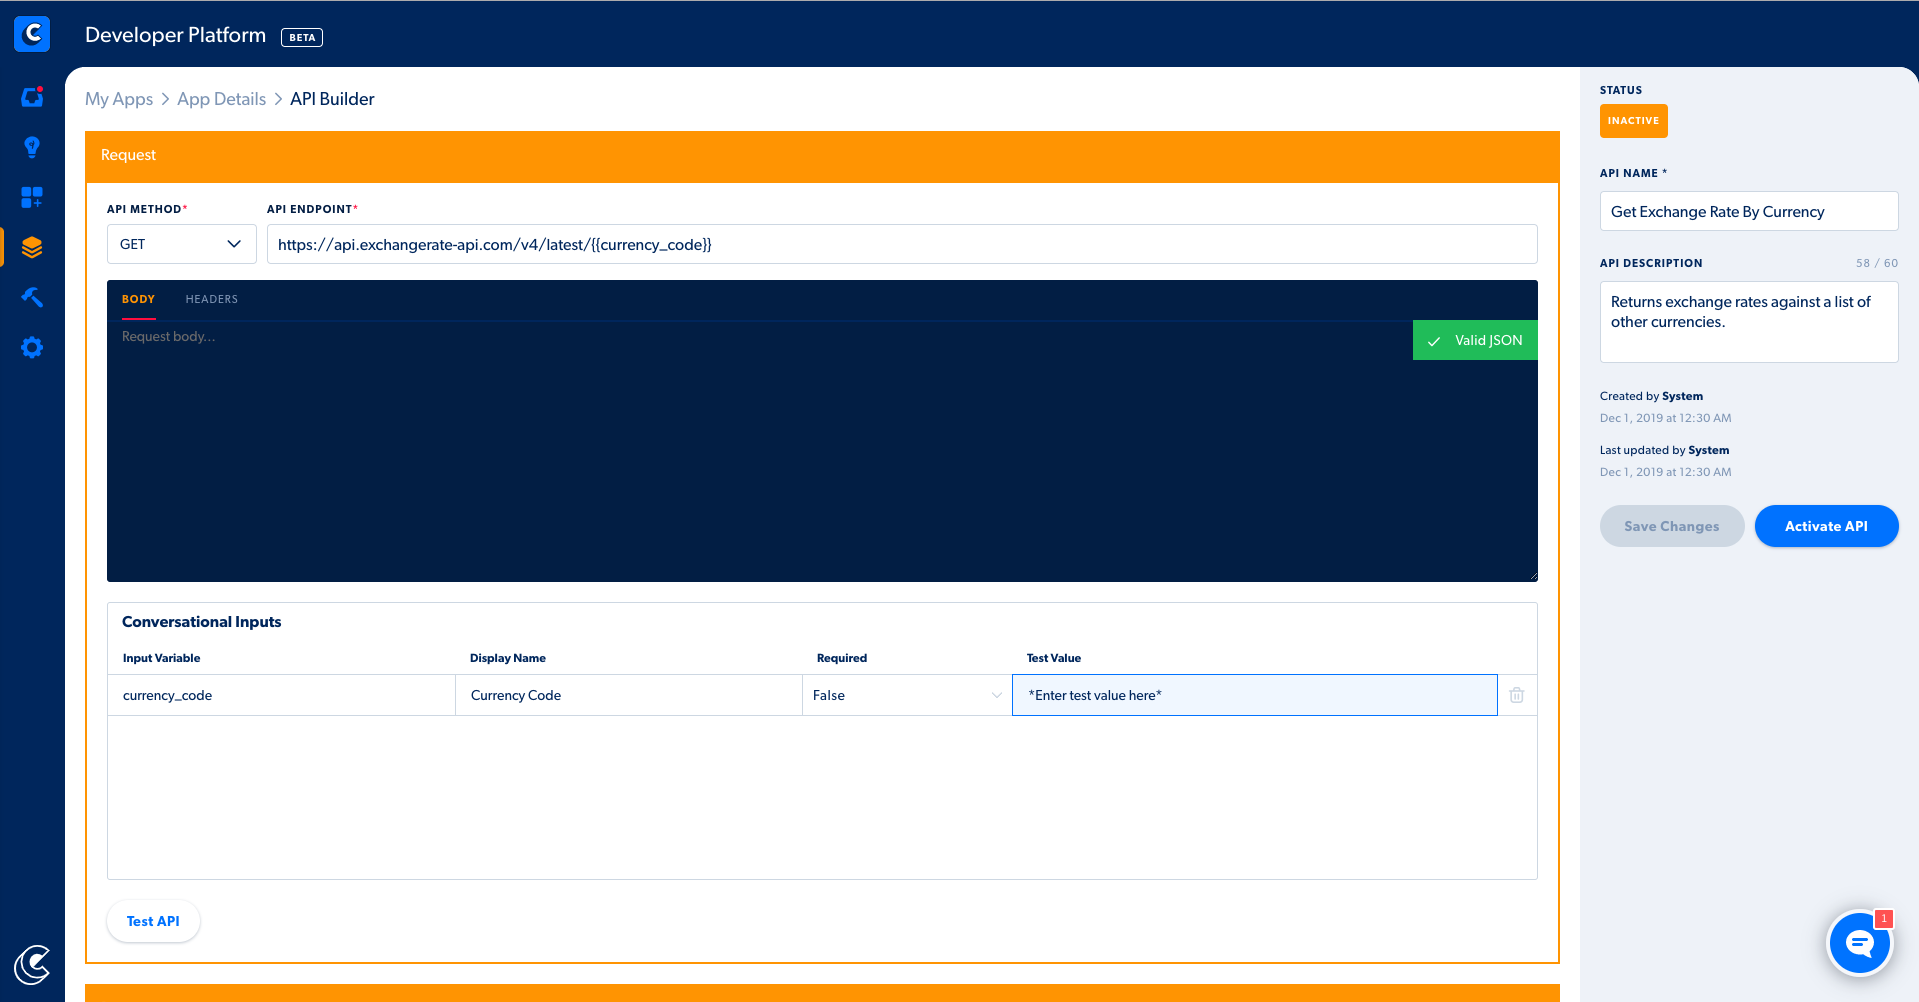
Request
An API request enables you to request information from or perform an action with an application.
A request contains following components:
- API Method - GET, PUT, POST, depending on the interaction you want to perform.
- API Endpoint - A URL that communicates with the app and performs a certain service.
- Body - Contains the data sent to the API. Used for PUT and POST requests. Supported formats: JSON.
- Headers - Headers carry meta-data associated with the API such as Authorization Tokens, proxies, etc.
- Parameters/Variables - Any word or phrase in double curly braces. Note that parameters/variables need to be lowercase and contain no spaces:
{{this_is_a_variable}}
The Get Exchange Rate By Currency API has one parameter: currency_code. All parameters are automatically added to the Conversation Inputs Table.
Note: Some applications require a Header to be set. You can do this by clicking on Headers and typing in Content-type for the Key application/json for the Value.
A Note on Guided Conversations
A Guided Conversation is a series of chat interactions with the Capacity bot. Guided Conversations are built using Capacity's Guided Conversation Builder. The builder lets you create custom logic without having to write code! Guided Conversations have the ability to collect information from an end user and invoke APIs through what are called Action Cards. To do so, the API's inputs and outputs that are relevant to the user have to be explicitly exposed to Guided Conversations. This explicit exposure is facilitated through Conversation Inputs and Outputs.
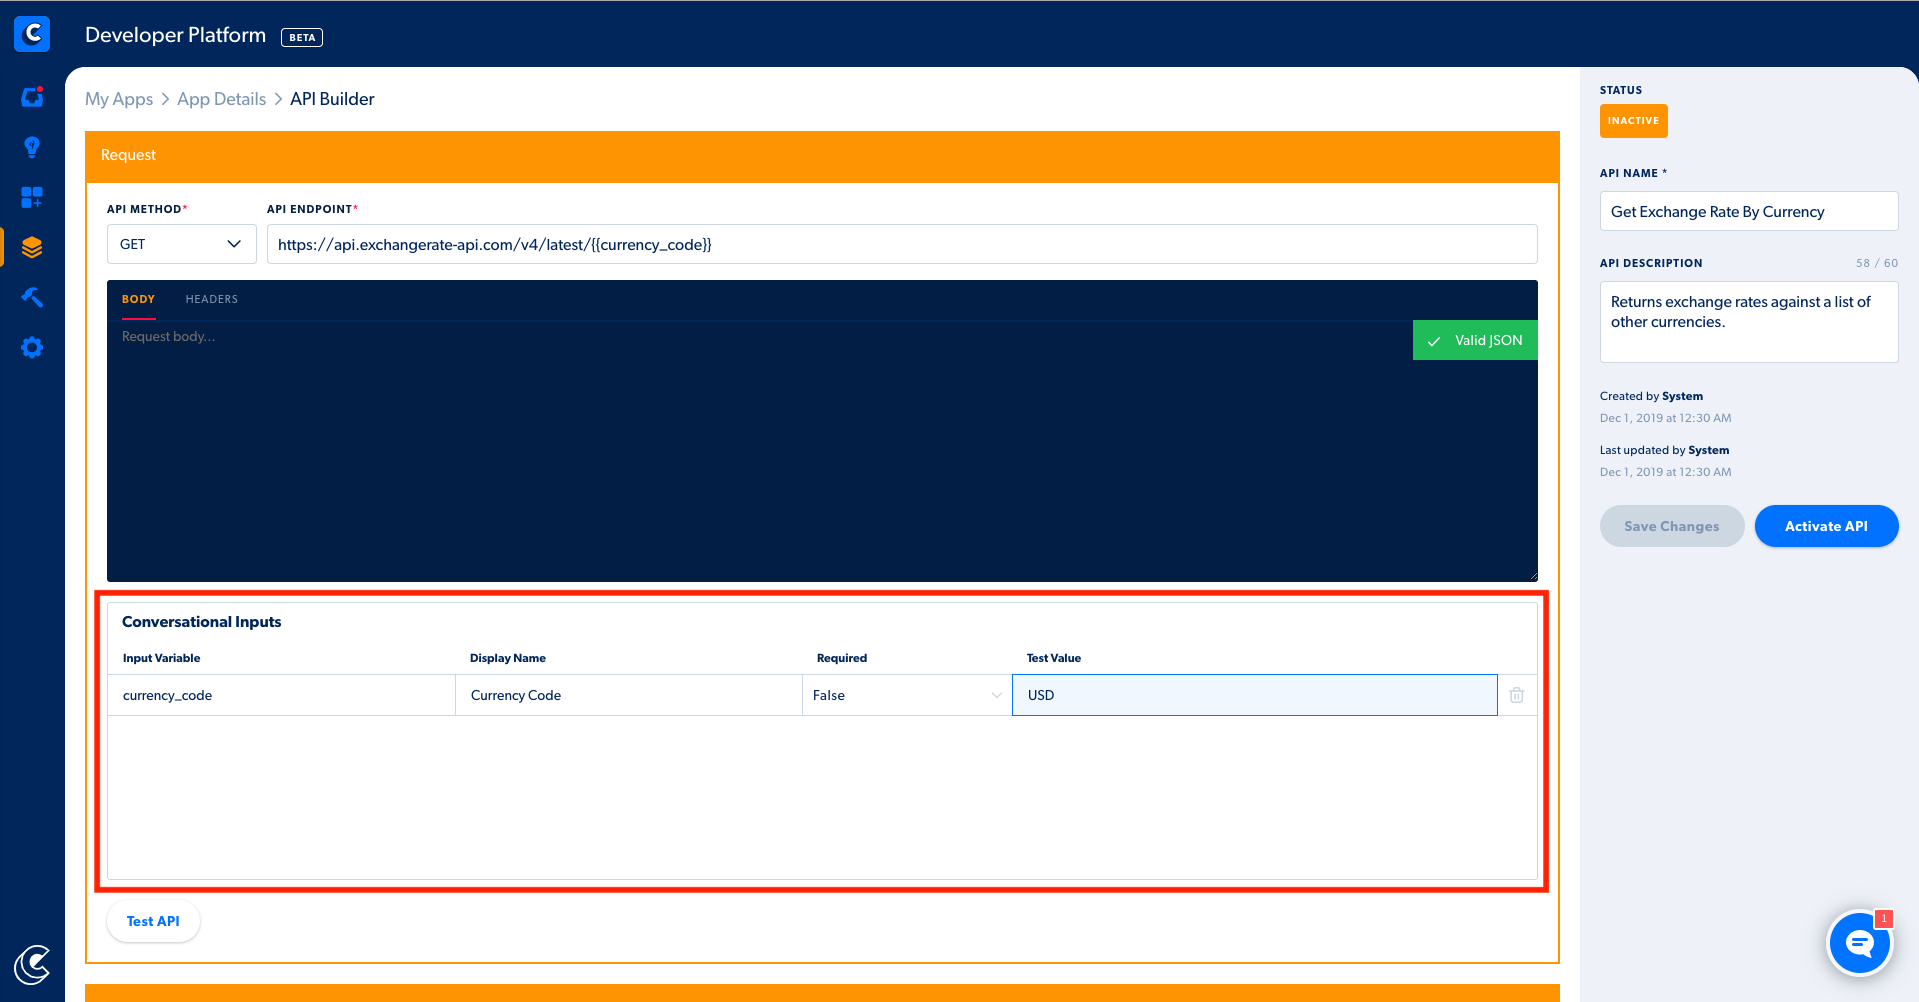
Conversation Inputs
Conversation Inputs are variables whose values are collected from an end user and passed on to an API request.
These variables are defined using double curly braces in the API request and are automatically added to the Conversation Inputs table.
Each variable will feature the following:
- Display Name - A readable name that shows up in the Conversation Builder.
- Required Field - Whether or not this variable is required for the API to work.
- Test Input - A place to provide values to the variables and test the API. Required variables must have test values.
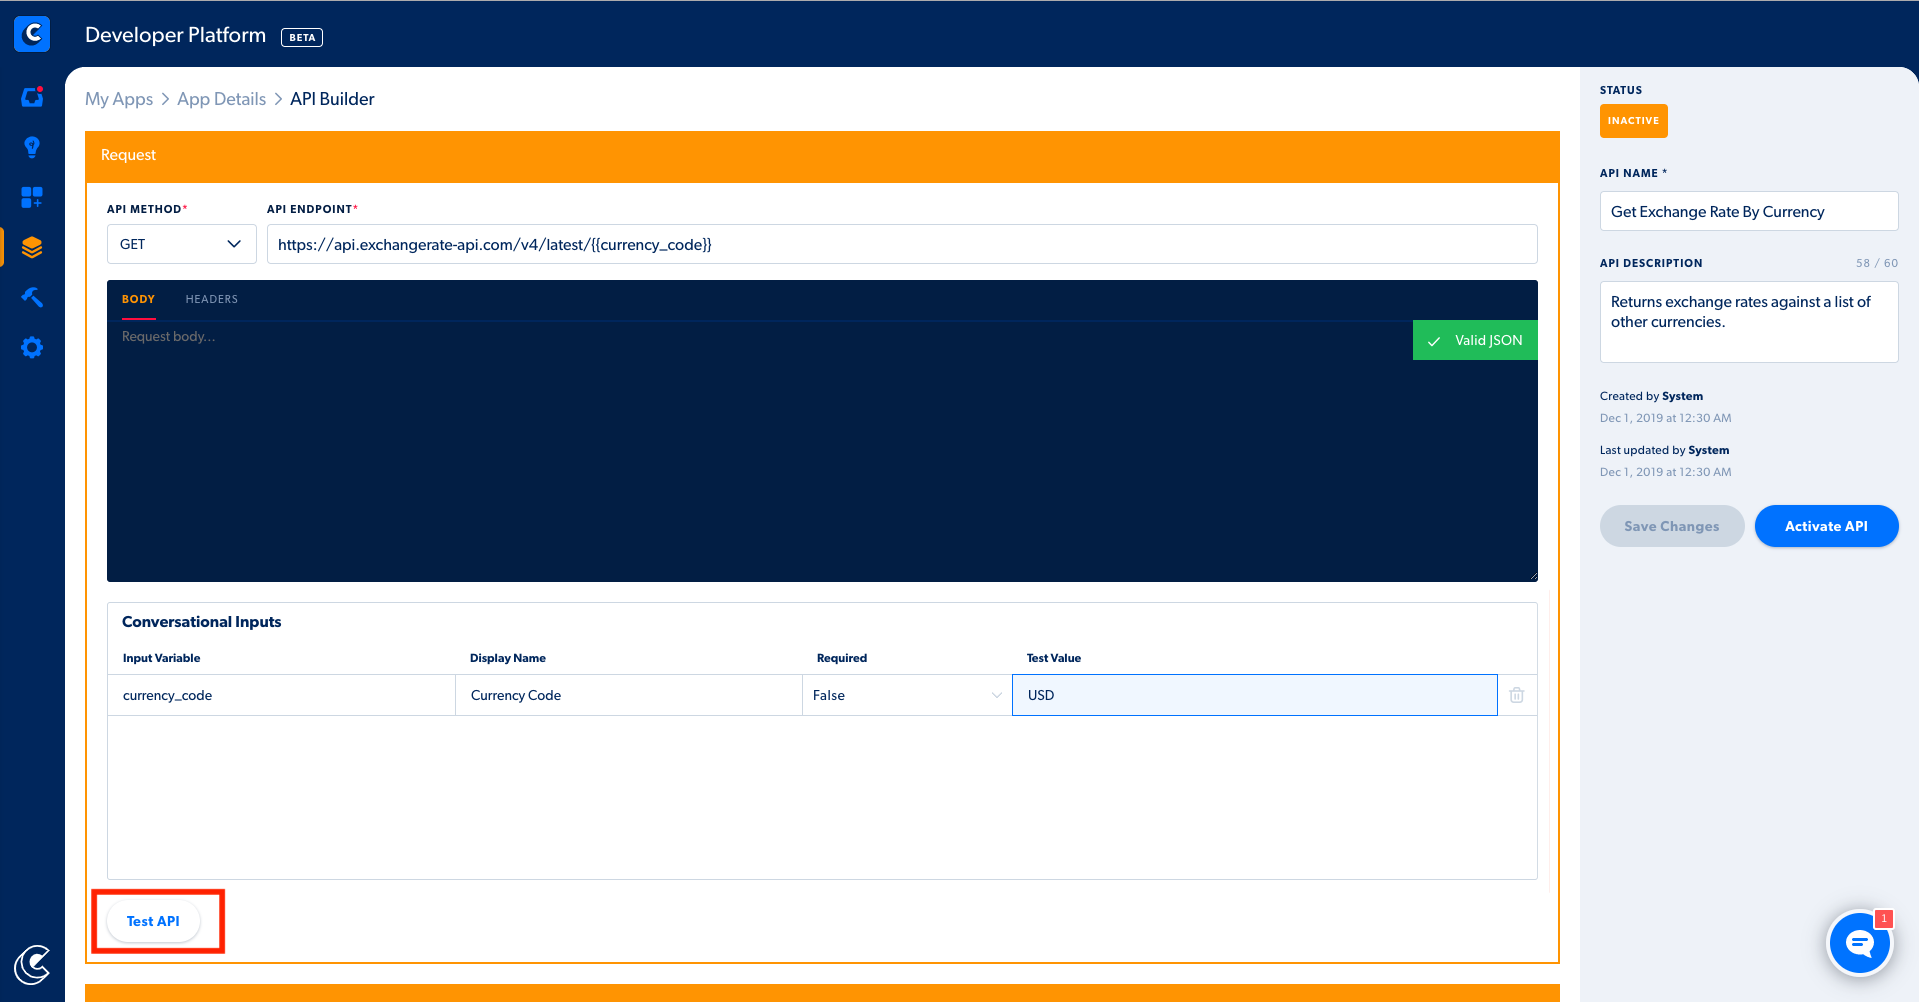
Test API
After configuring the Request and setting up the Conversation Inputs table, you are now ready to test your API. Please enter the correct inputs to your API in the Request Body JSON and in the Test Value field in the Conversation Inputs table. Fields that are marked as required must have a valid value.
After you have tested the API, you will receive a response.
Response
The response is the output of the API. It is what the application sends back in response to the request.
The response contains a JSON body component.
In this scenario, we receive a list of currencies and their exchange rates for our test Value "USD".
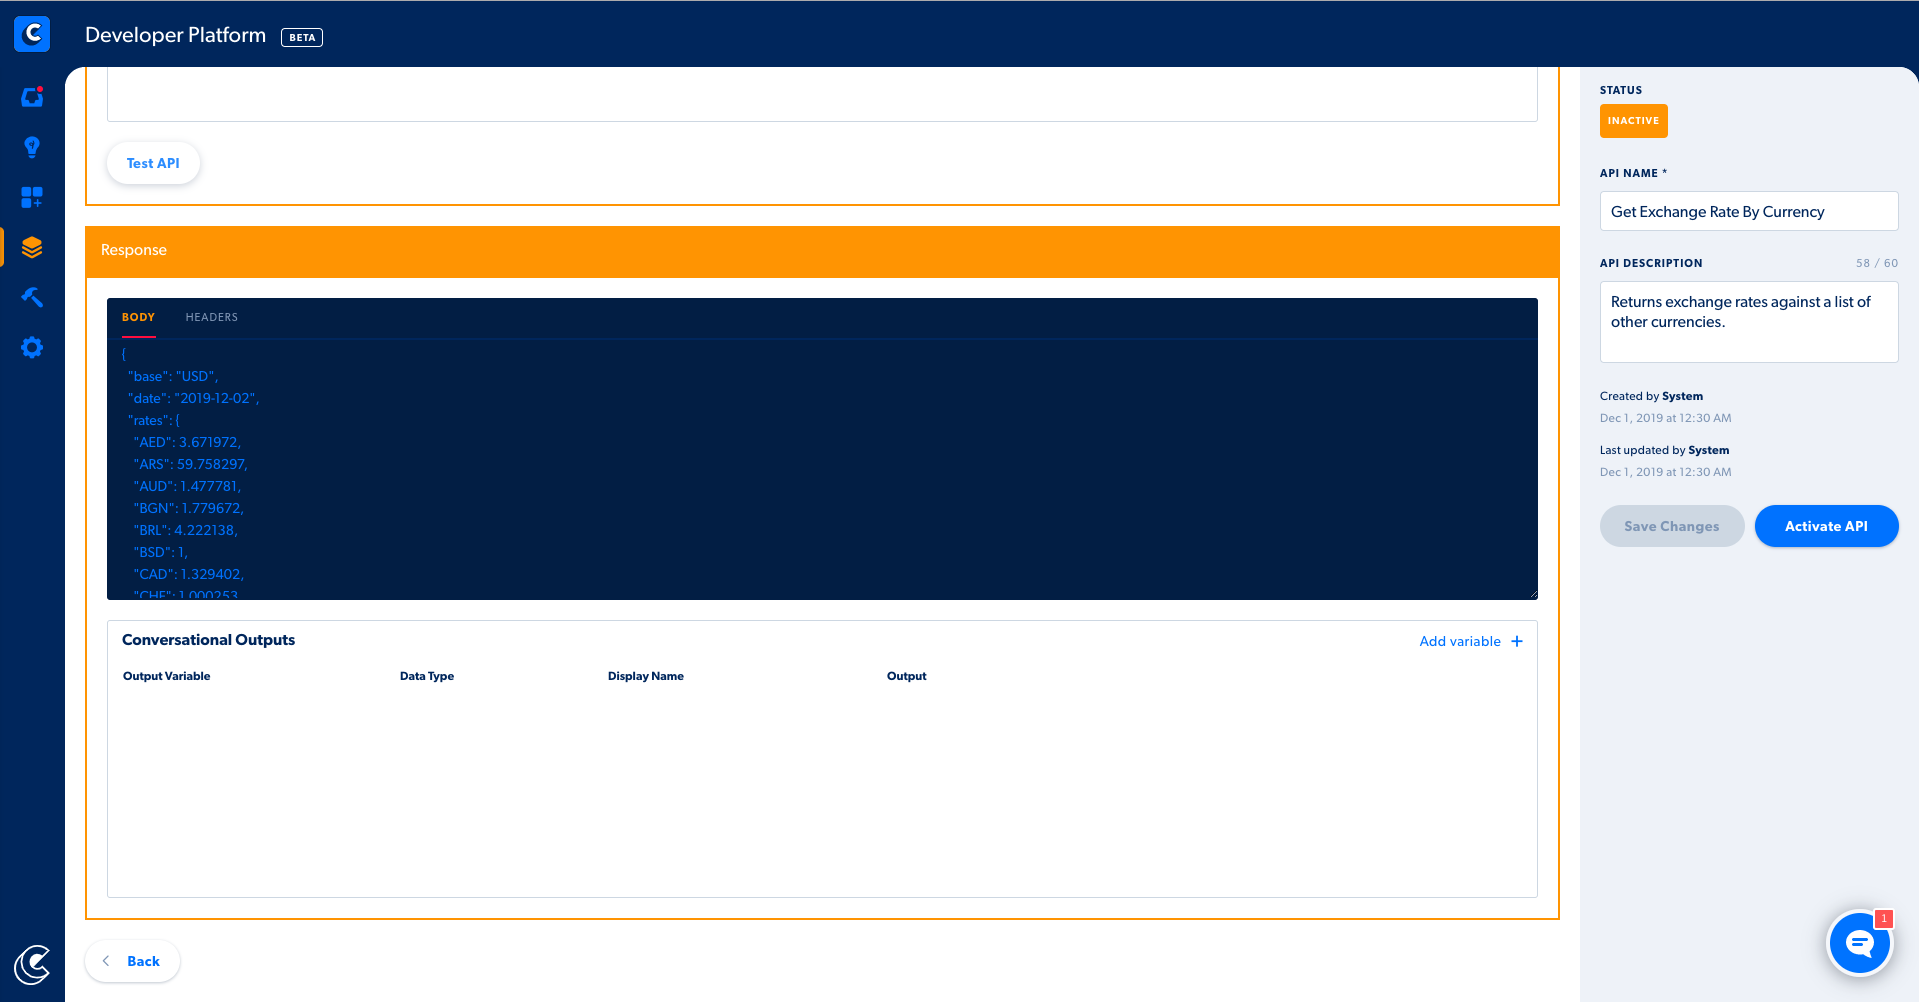
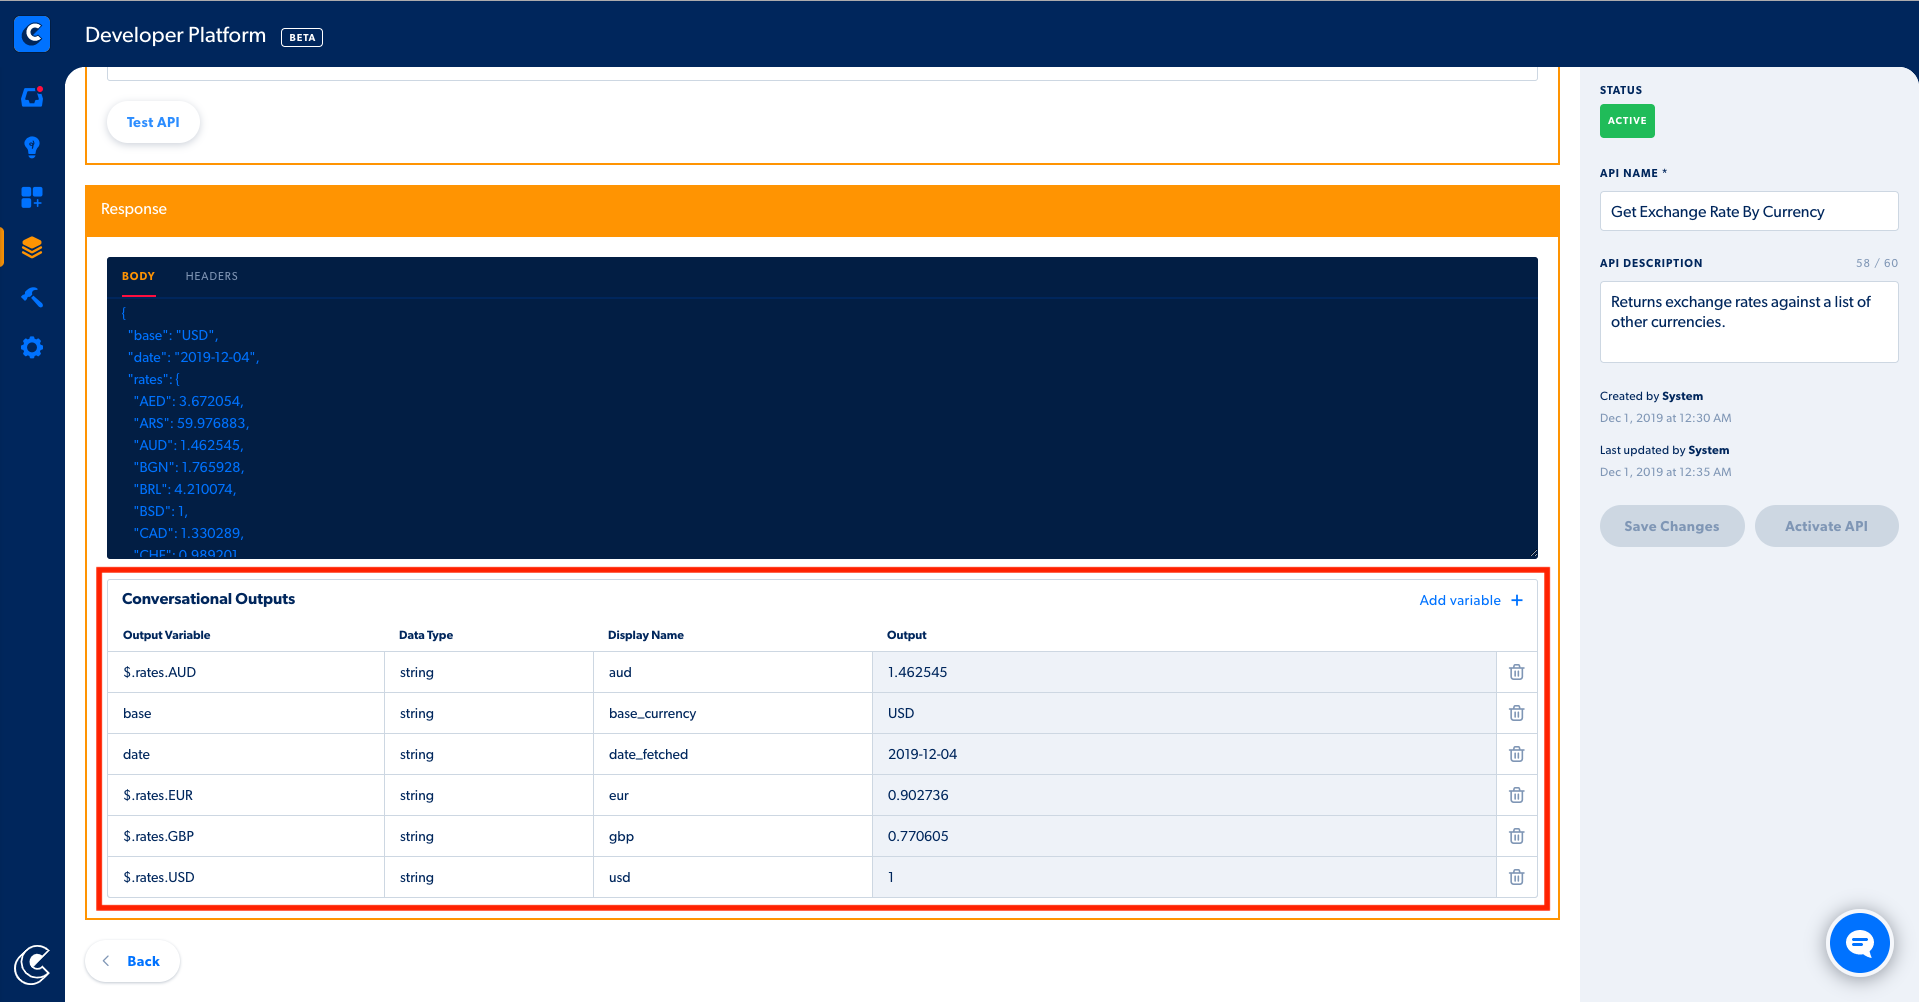
Conversation Outputs
Conversation Outputs are values from an API response which are are passed to an end user through a Guided Conversation.
Unlike Conversation Inputs, these variables have to be manually added to the Conversation Outputs table. A Conversation Output requires the following settings:
- Output Variable: This is the full JSON path returned from the API. Refer to this link for an introduction to JSON path: https://restfulapi.net/json-jsonpath/
- Data Type: This is the type of data which will be passed to the Guided Conversation. This is not editable since
stringis the only data type currently available. - Display Name: The is the variable name which will later be used in the Guided Conversation to display the value returned from the API. This value can be one or more words, but needs to be lowercase with no spaces, for example: this_is_an_example.
- The Output field in the table will automatically show you what would have been passed from the test call to the API.
Note: Any changes you make to these values are saved automatically!
For our exchange rate API, let's return only the base currency, date fetched, and exchange rates against USD, AUD, EUR and GBP, in our conversation to the end user.
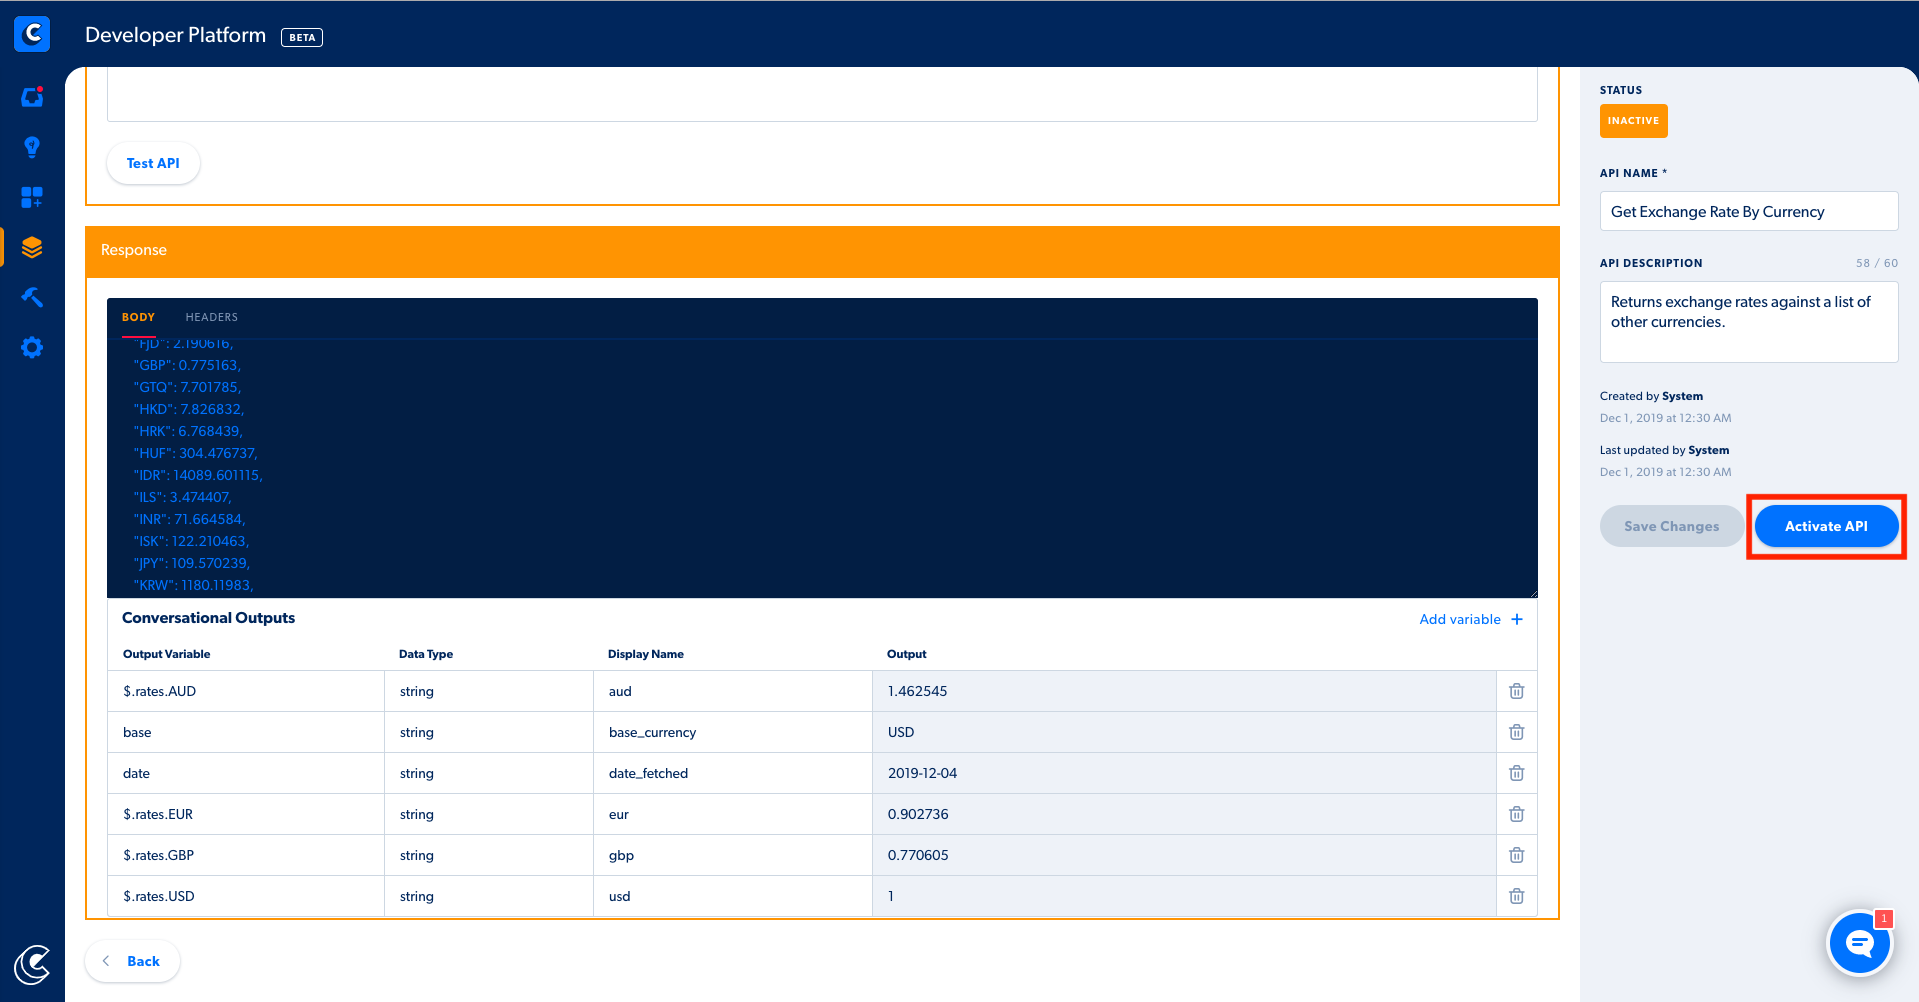
Activate API
Once you have sufficiently tested the API, you can Activate it for use it in Guided Conversations. Once an API is activated, it is not recommended to further modify the API. However we understand that there will be times when an active API will need to be modified. Please note that any modifications to an Active API will affect Guided Conversations where this API may have been used and will need to be manually updated.
Click on Activate API to make the API active.
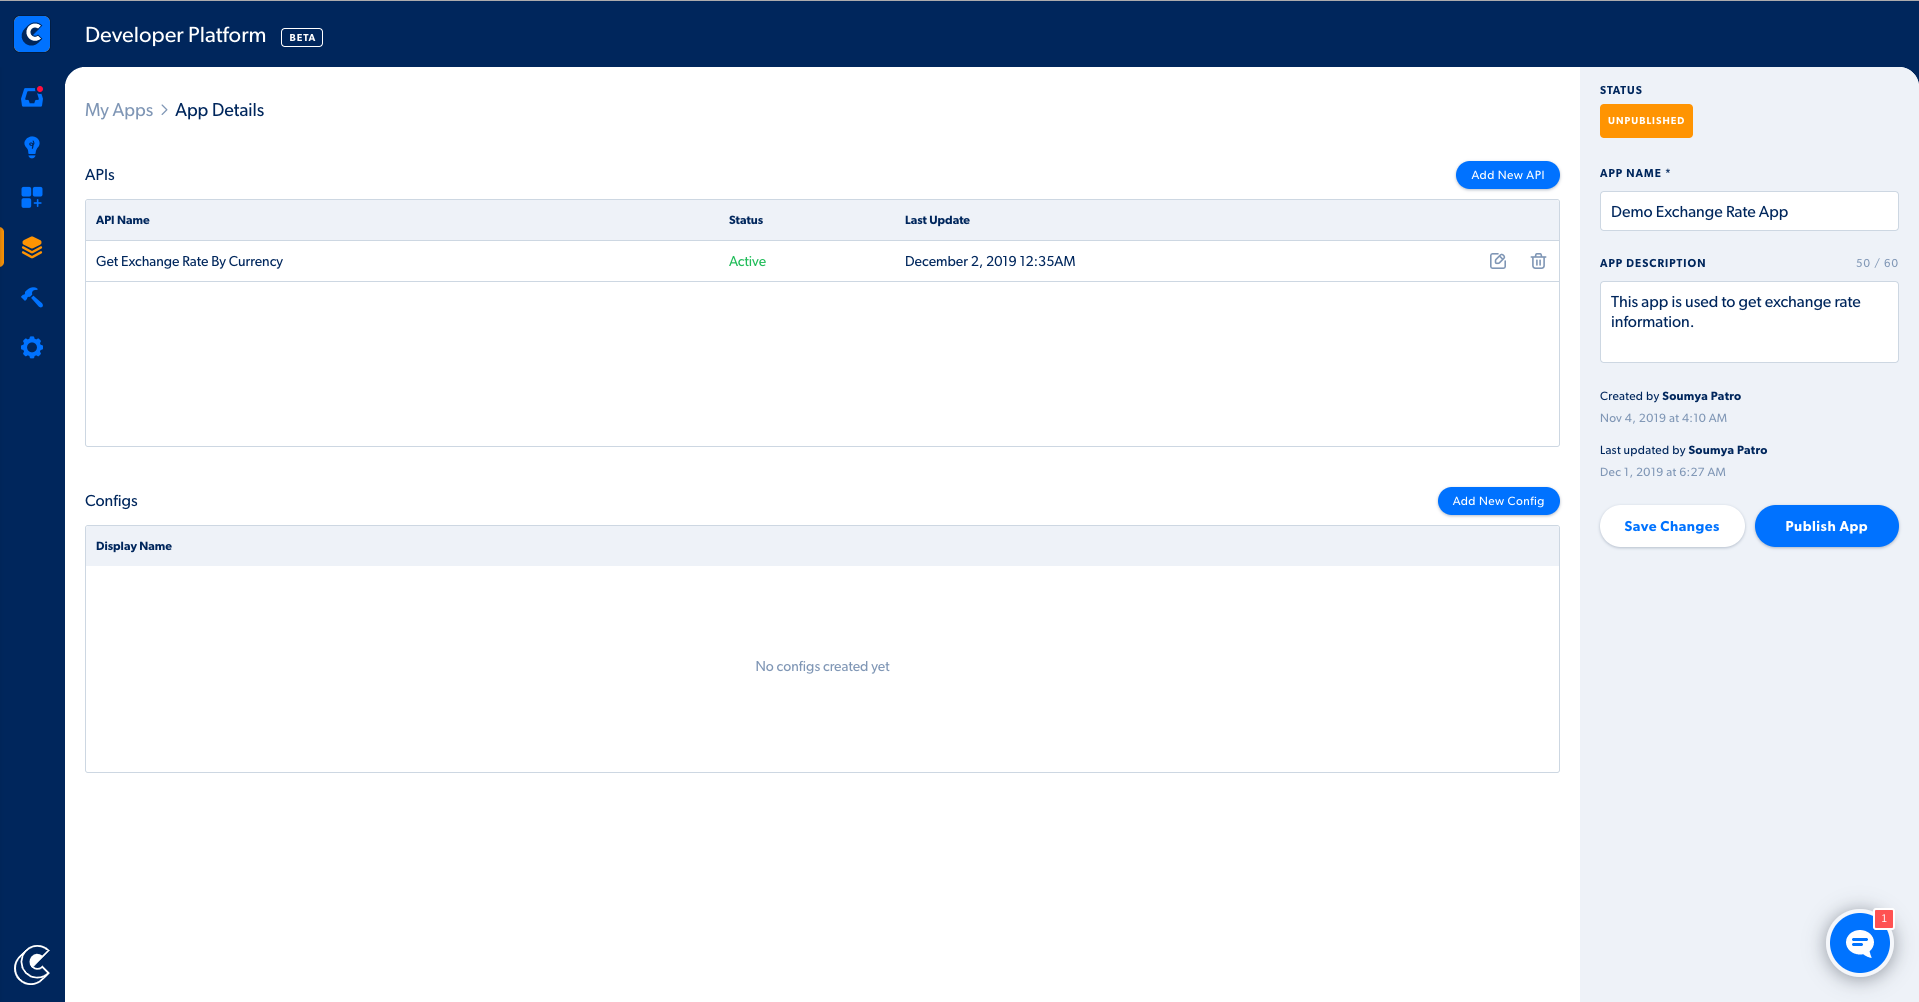
Step Three: Publish Application
Now that your app has a collection of APIs, you are ready to publish your application to the App Store.
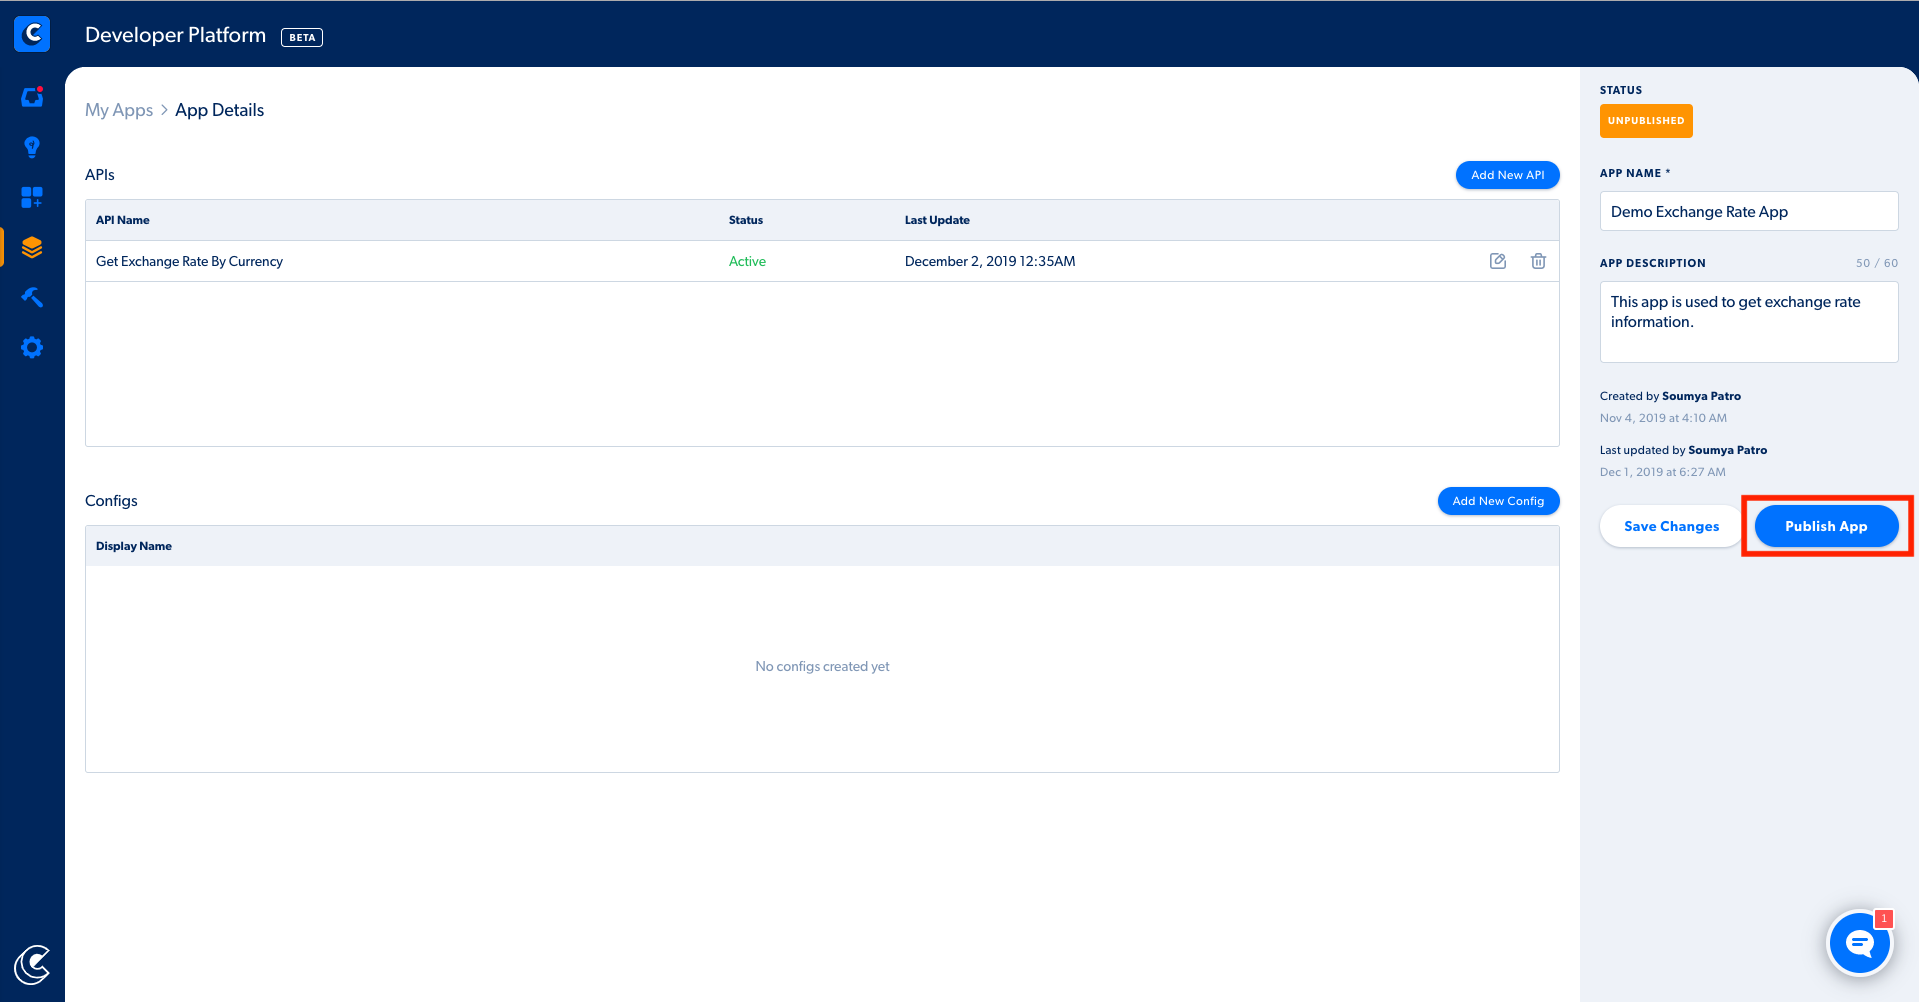
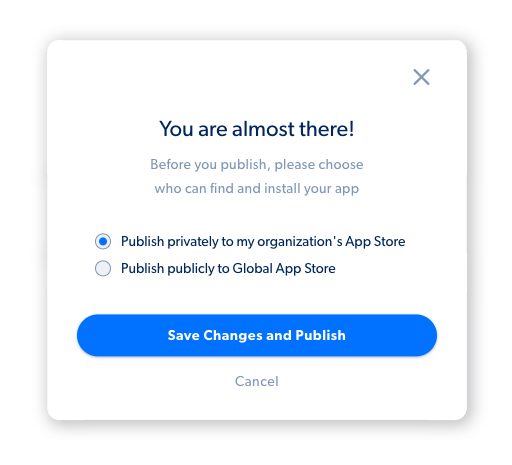
Publishing Options:
- Private - If you publish privately, only members in your organization can view, install, and use this app integration. We recommend this setting unless you want to allow other organizations to install and use your application.
- Public - If you publish publicly, any organization can add this integration to their Capacity Platform and start using it.
Congratulations, your app is now live on the App Store! You are now ready to install and create conversations using your application.
Step Four: Install App
Before using the app you've just created, you will need to navigate to the app store to install your app.
- Click the App Store icon located in the blue navigation bar.
- Check your app to ensure that the toggle has been switched to green.
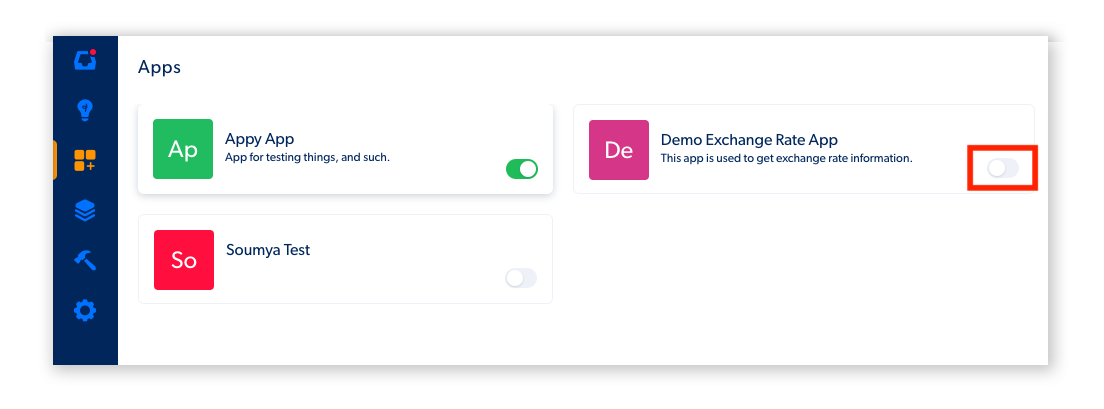
This application is now available for use in the Guided Conversations builder.
Step Five: Using Apps in a Guided Conversation
Create a Blank Guided Conversation:
- Click the Knowledge Base icon in the blue navigation bar on the left.
- Click on the blue + Add button in the upper right corner, and click the dropdown to select Create Dialogue.
Give the dialogue a name in the popup and you'll see the following:
Enter an inquiry and click with the Save and Continue, to start a new Guided Conversation.
Next, navigate to the Edit Conversation screen to add your application:
- Click Edit the Conversation in the upper right hand corner to get started.
2. Add your application to the conversation by clicking on Add Application.
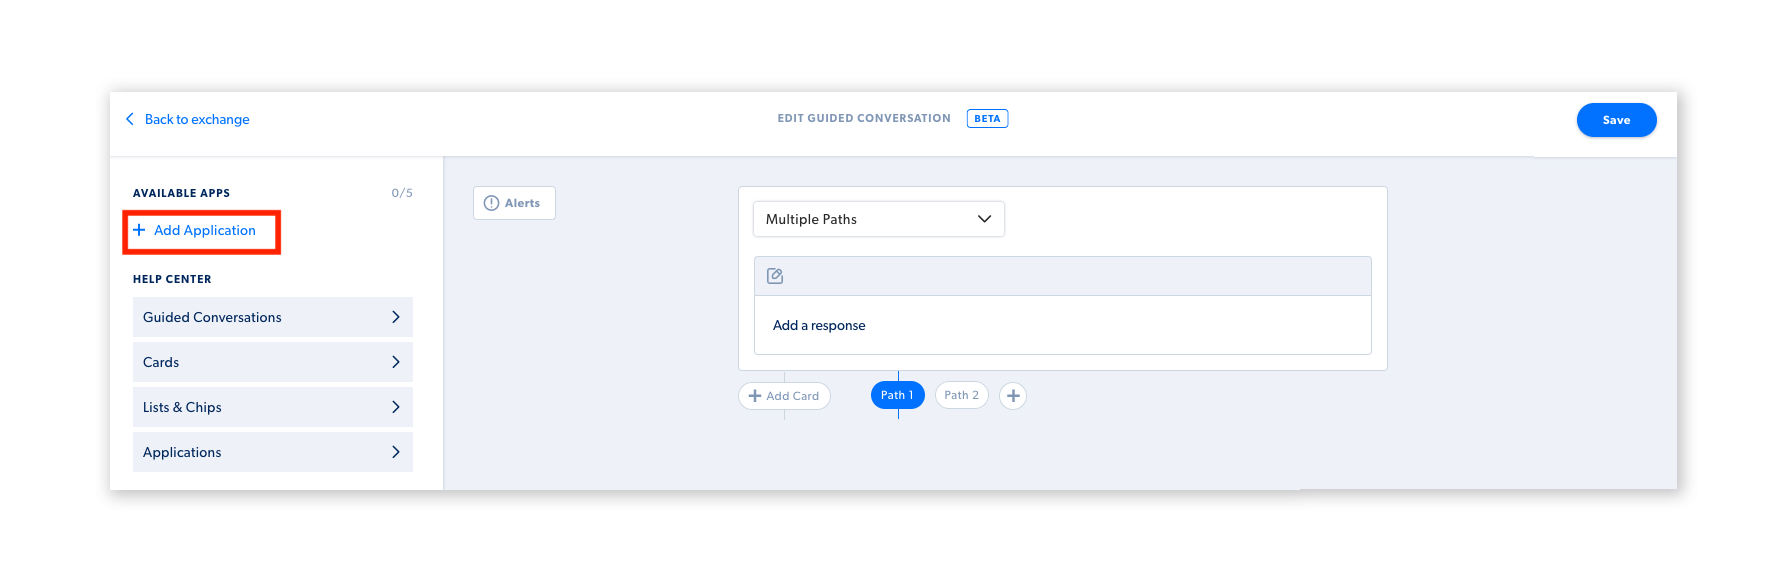
3. After adding your app, the Guided Conversations builder will display your app under Available Apps.
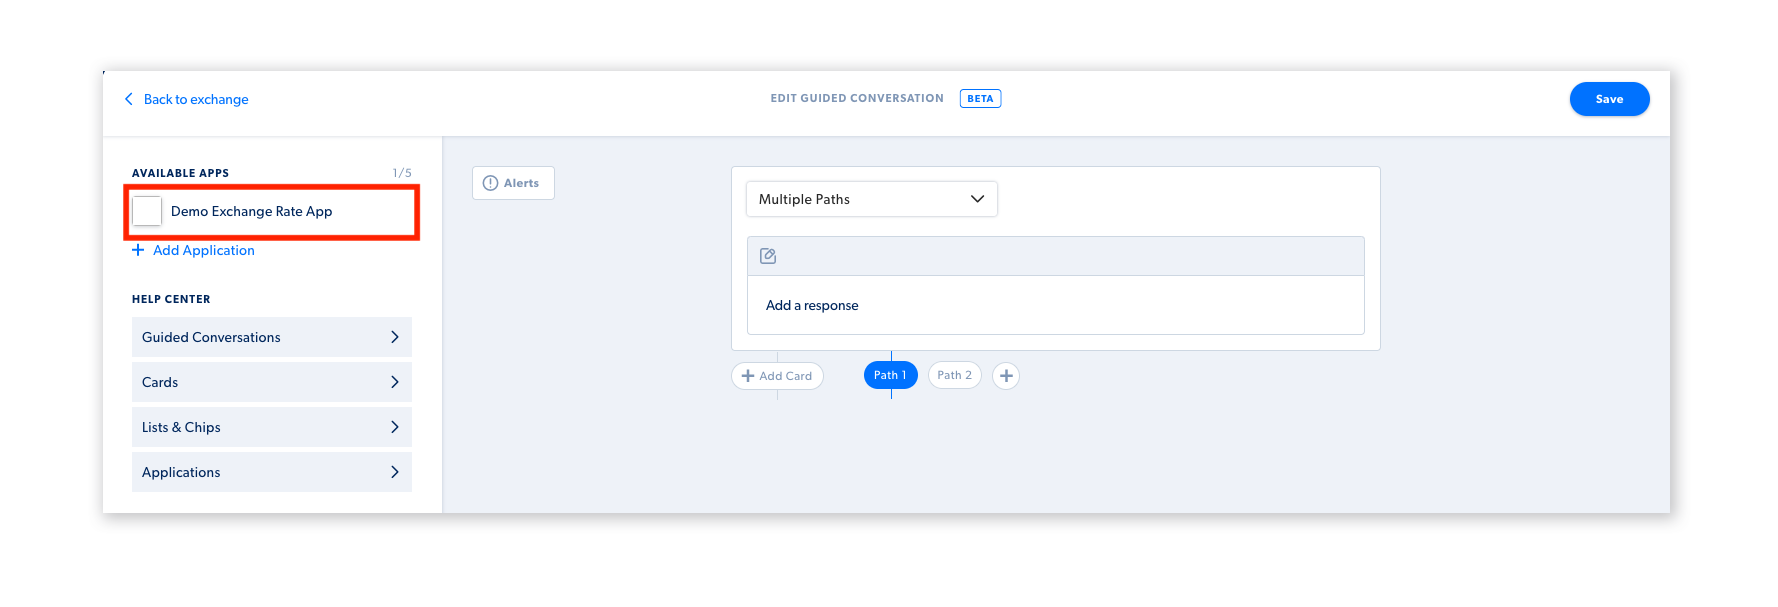
4. Refer to the Help Center in the Conversation Builder for details on various components and how to use them. You are now ready to create your custom logic using the App. Below is a sample Guided Conversation using the Demo Exchange Rate App we just built.
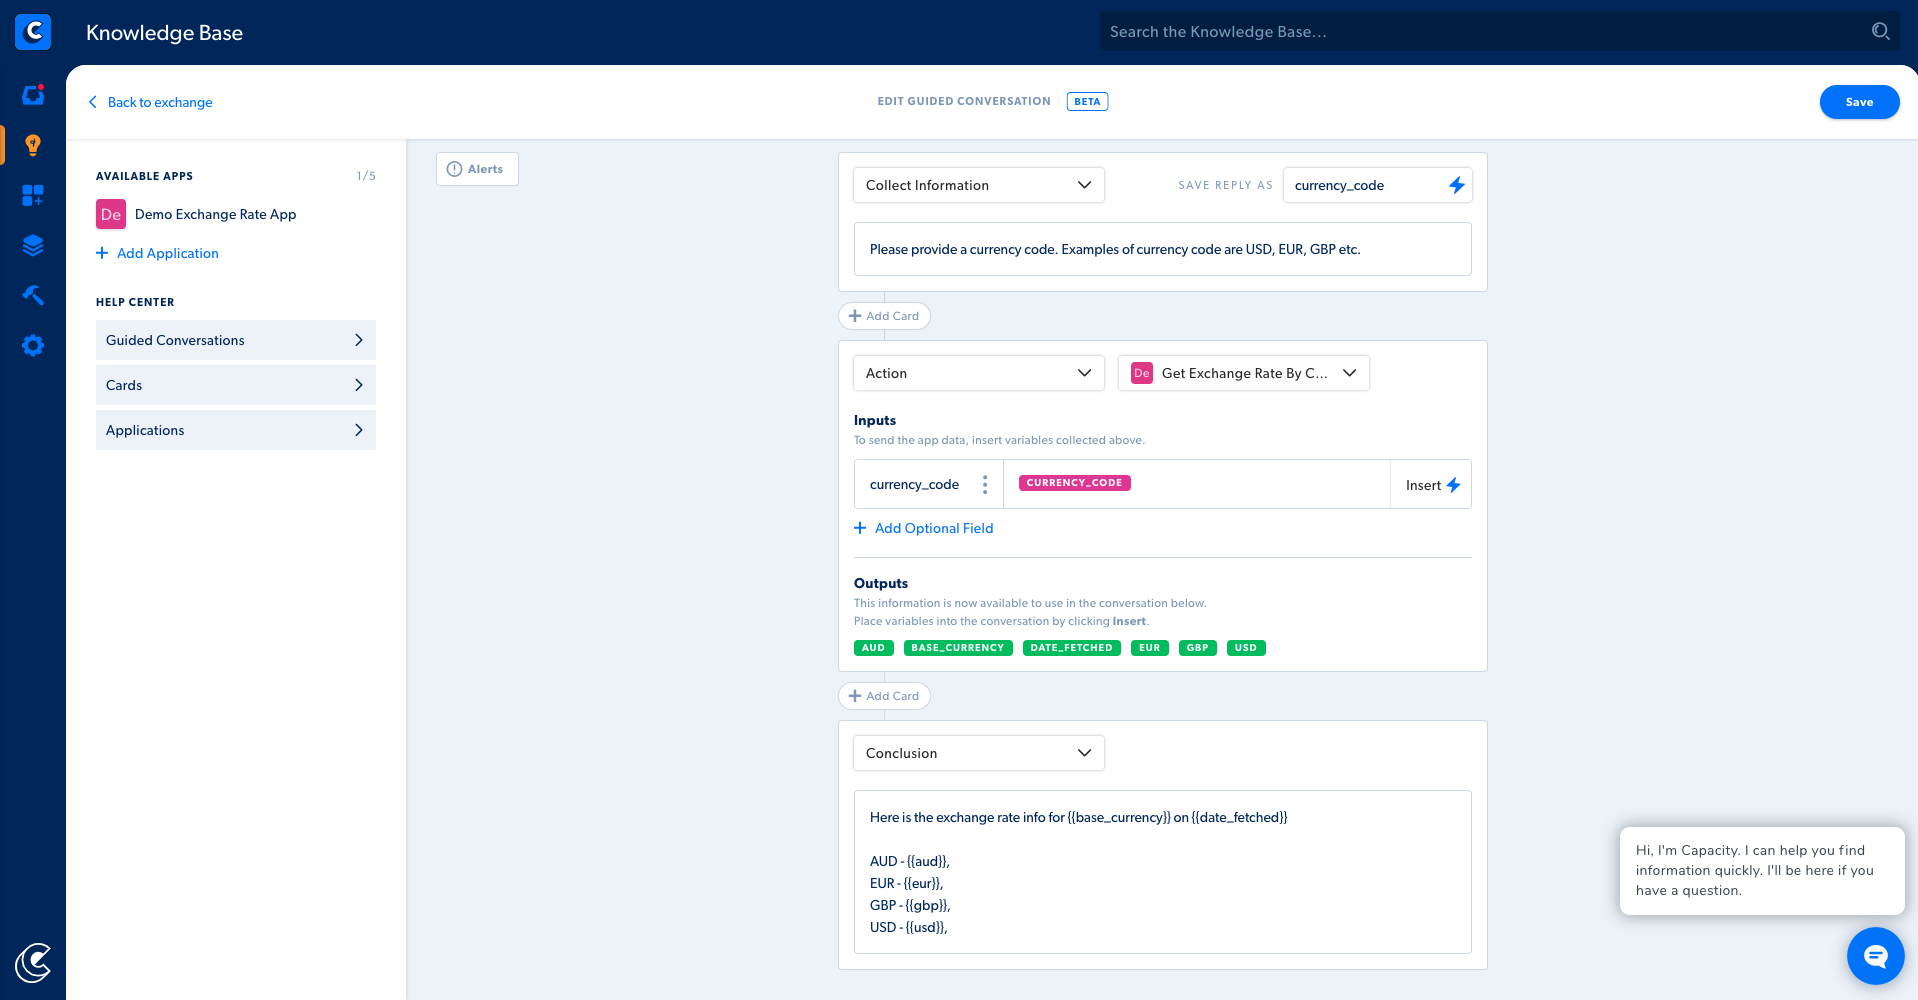
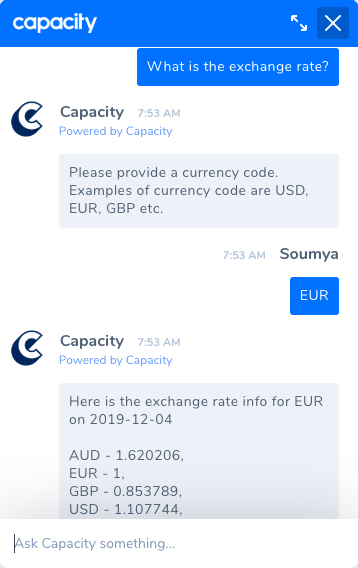
Start chatting with Capacity from the interface of your choice (Slack, MS Teams, the Capacity web concierge, etc.) and test the Guided Conversations you created for this app!