Teams, Projects, & Content Groups
Teams
Add teams within the console to help organize your team members. Teams can be added to Projects for the routing of Tickets and Live Chats. By default, anyone added to the Capacity console will automatically be added to the CoPilots Team.
- Click the settings icon in the left menu bar.
- Select Teams under Org Management.
- Use the Add button in the upper right-hand corner to create a new team in the console.
- Insert the team name and hit Save.
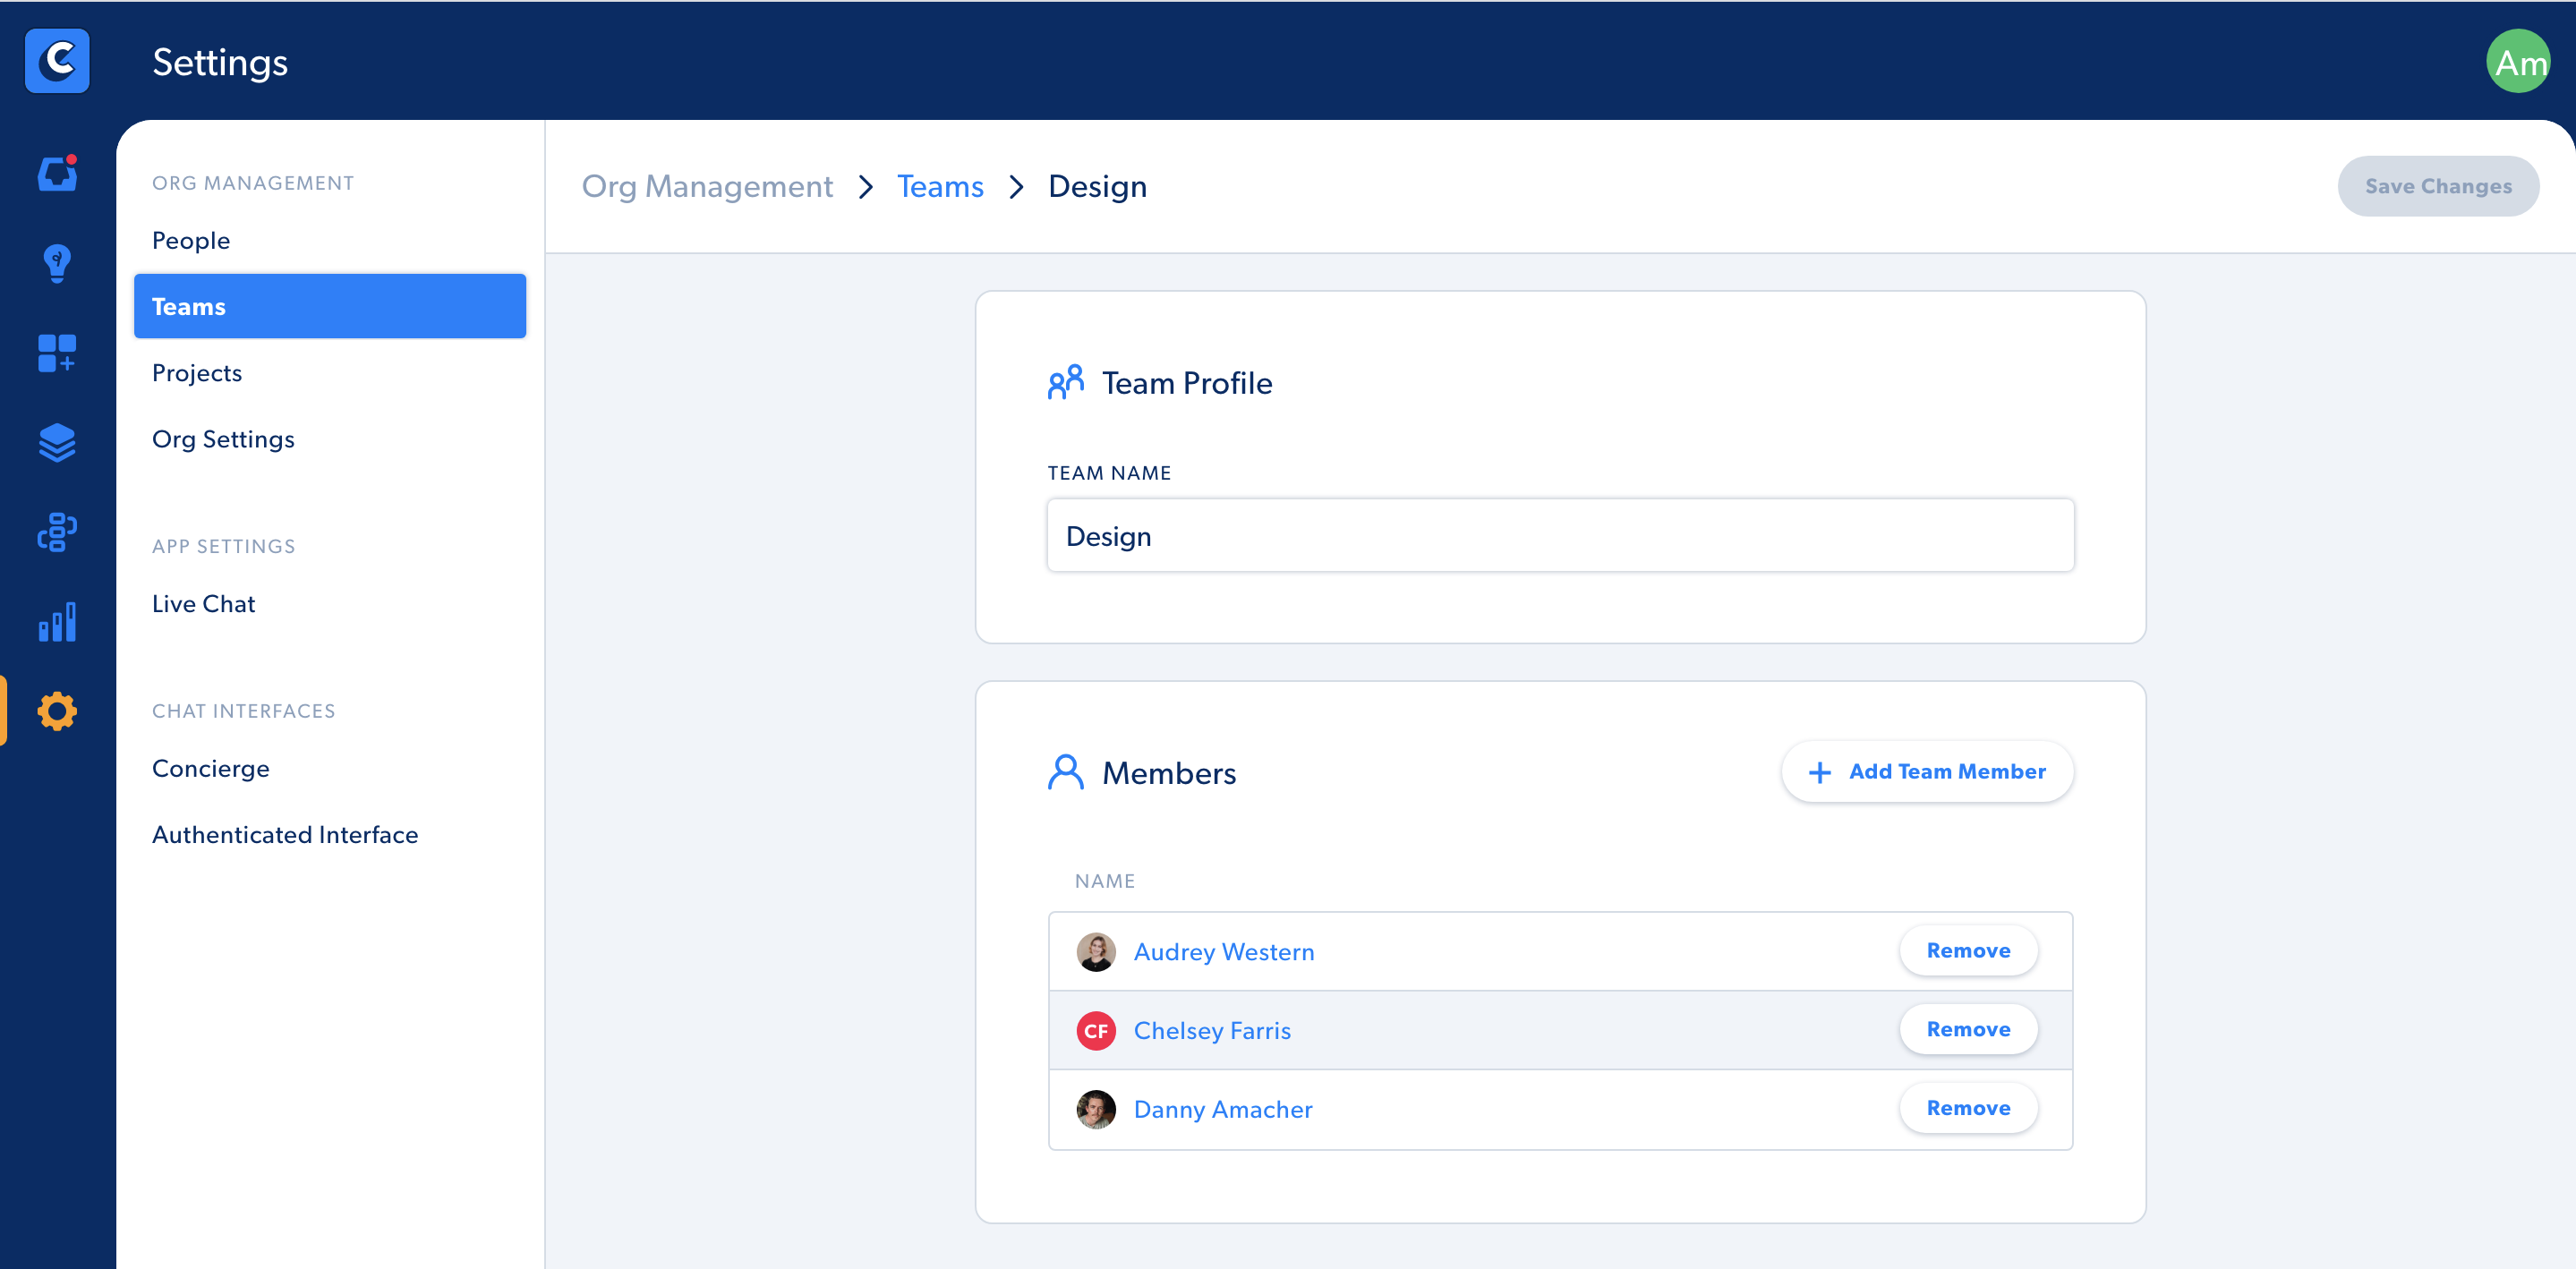
To add team members to a team:

- Click the settings icon in the left menu bar.
- Select Teams under Org Management.
- Choose the team that you want to edit.
- In the Members section, hit the Add Team Members button.
- Select team members from the list to add to a specific team.
Tip for Org Admins: Create an Admin team that you can assign to every project if you'd like to have a view of all tickets being created in Capacity.
To delete a team:
Email support@capacity.com and include the specific team you would like deleted.
Projects
Projects allow you to route tickets and live chats to different teams. Add projects within the console and assign them to teams. Use Projects to route and assign Tickets and Live Chats.
- Click the settings icon in the left menu bar.
- Select Projects under Org Management.
- Use the Add button in the upper right-hand corner to create a new project.
- Insert the project name and an abbreviation for the key.
- Hit Save.
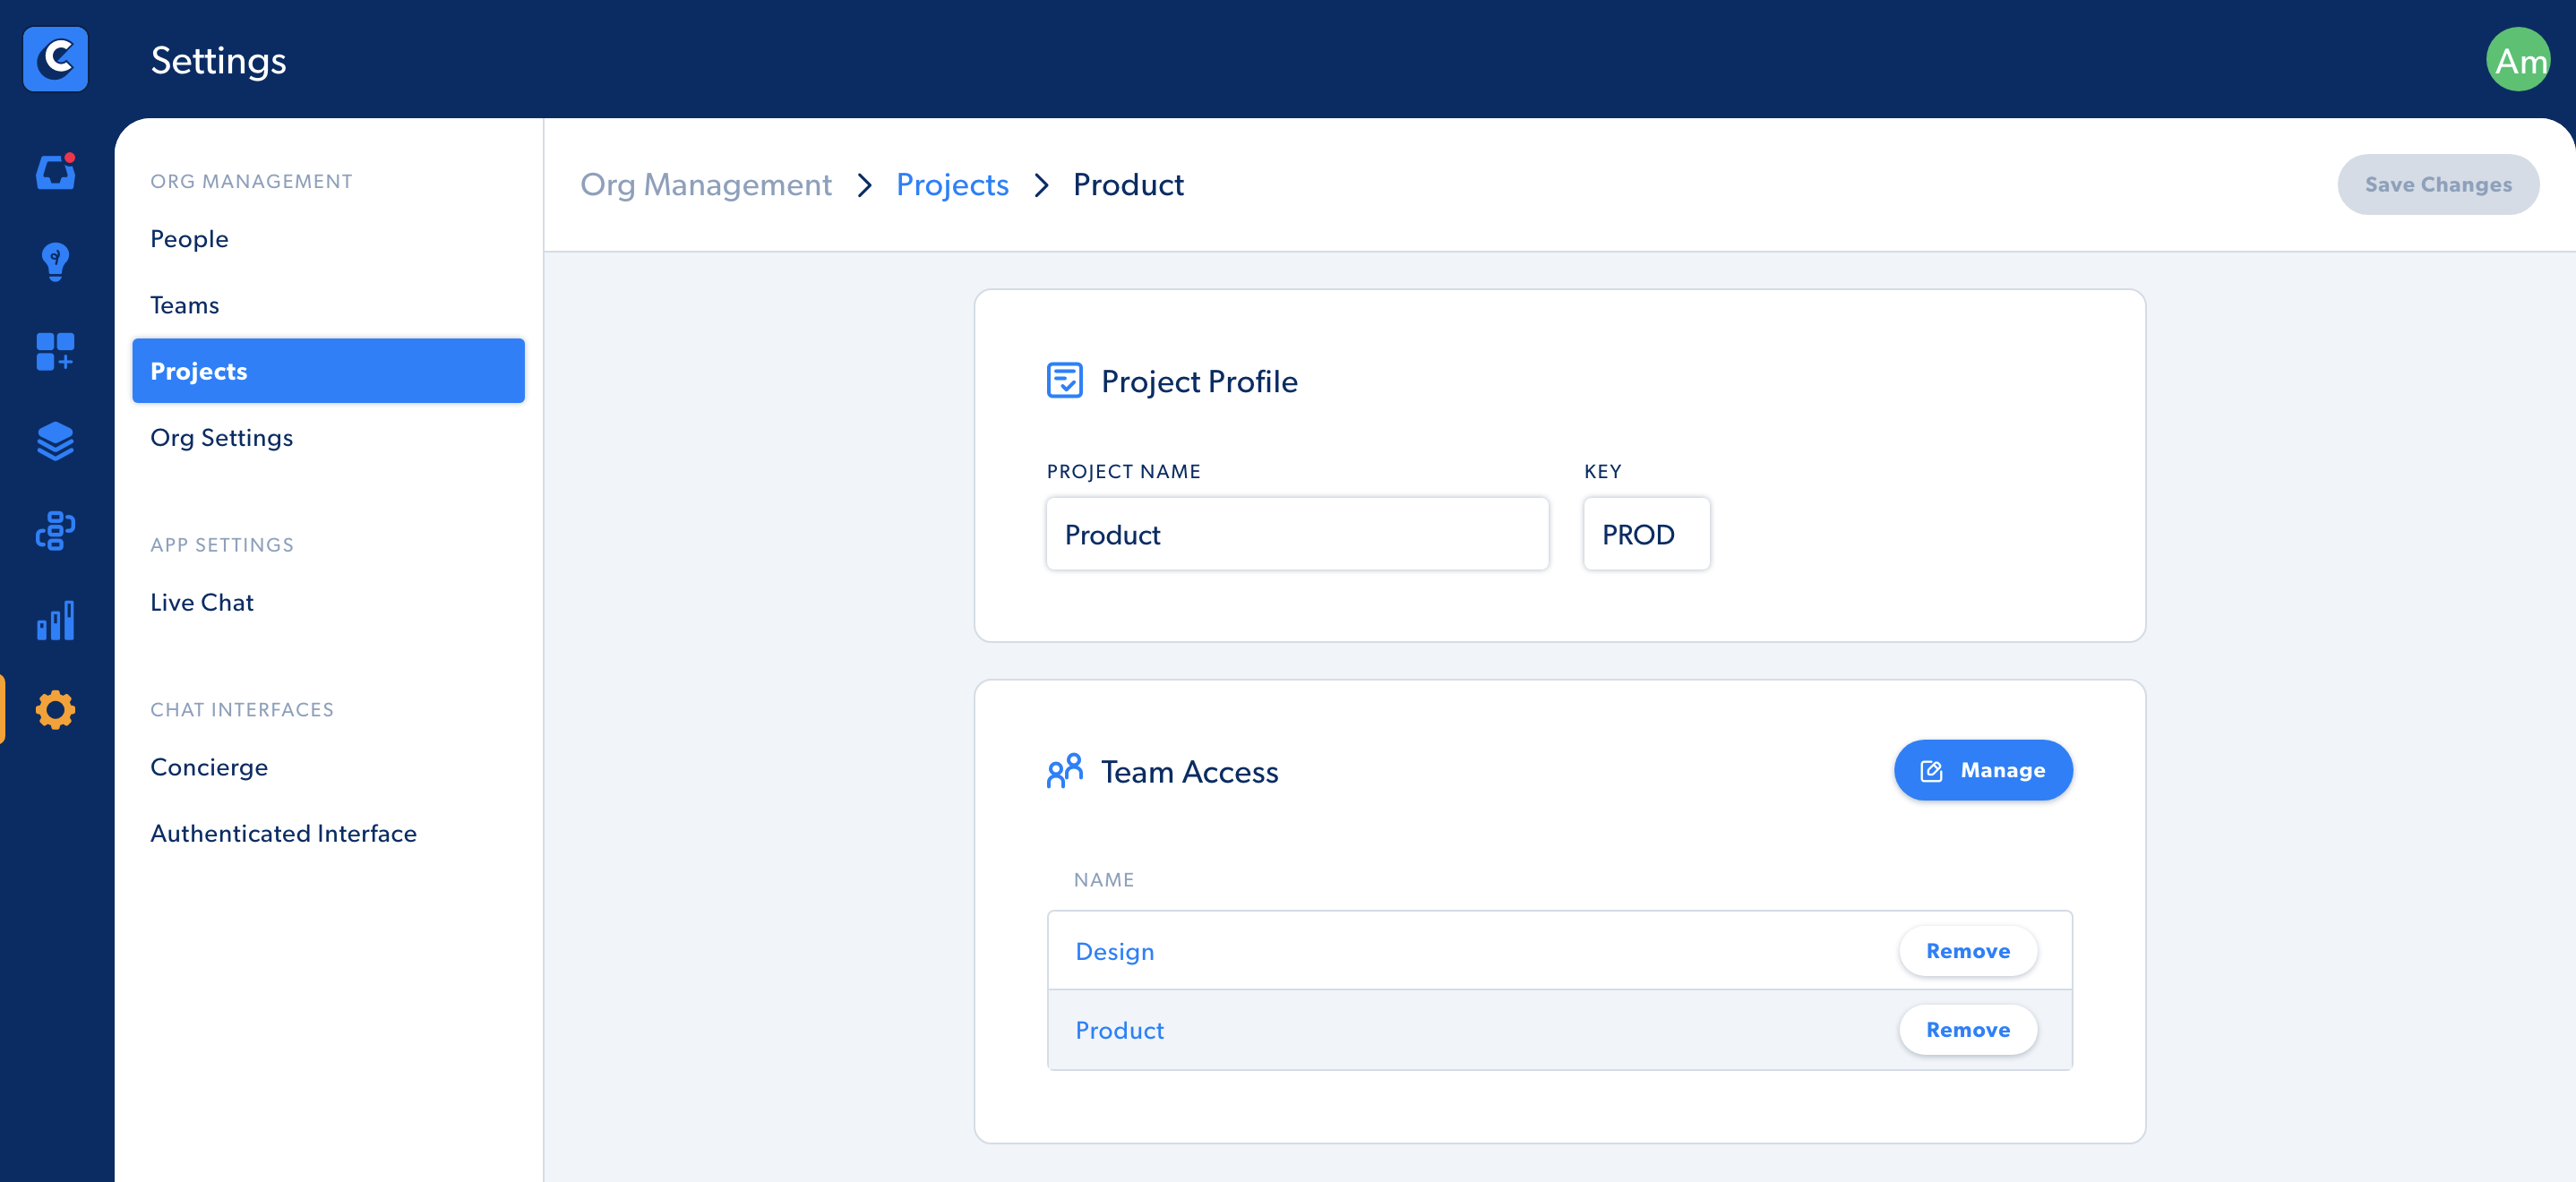
To add teams to a project:

- Click the settings icon in the left menu bar.
- Select Projects under Org Management.
- Choose the project that you want to edit.
- In the Team Access section, hit the Manage button.
- Select the teams that you want to assign to this project.
Note: As long as the person has a role that gives them full access to the HelpDesk they can assign tickets to any other project, even if their team isn't on the project.
To delete projects:
- Email support@capacity.com and include the specific project you would like deleted.
- If helpdesk tickets are currently assigned to the project that is requested to be deleted, please include the project to where these tickets should be reassigned.
Content Groups
Control user access to information stored in the Capacity Knowledge Base.
- Click the settings icon in the left menu bar.
- Select Content Groups under Org Management.
- Use the Add button in the upper right-hand corner to create a new group.
- Insert the group name.
- Hit Save.
To add members to a group:
- Click the settings icon in the left menu bar.
- Select Content Groups under Org Management.
- Choose the group that you want to edit.
- In the Members section, hit the Add Member button.
- Select the team member(s) you wish to add to the group.
- Click the Add Person button.
